When tackling real world problems writing the code is only part of the story. Getting the code into the hands of the people it was written for is sometimes just as much of a problem as it was to develop it in the first place.
Companies or teams often feel the pain of code deployment as they scale. It doesn’t take long before emailing a script for someone else to run on their PC is no longer sufficient (not to mention the operational risk of such practices). Web apps can be an attractive solution but the development, infrastructure and maintenance required presents a new set of problems.
The following video accompanies this article.
Table of Contents
Introducing Anvil
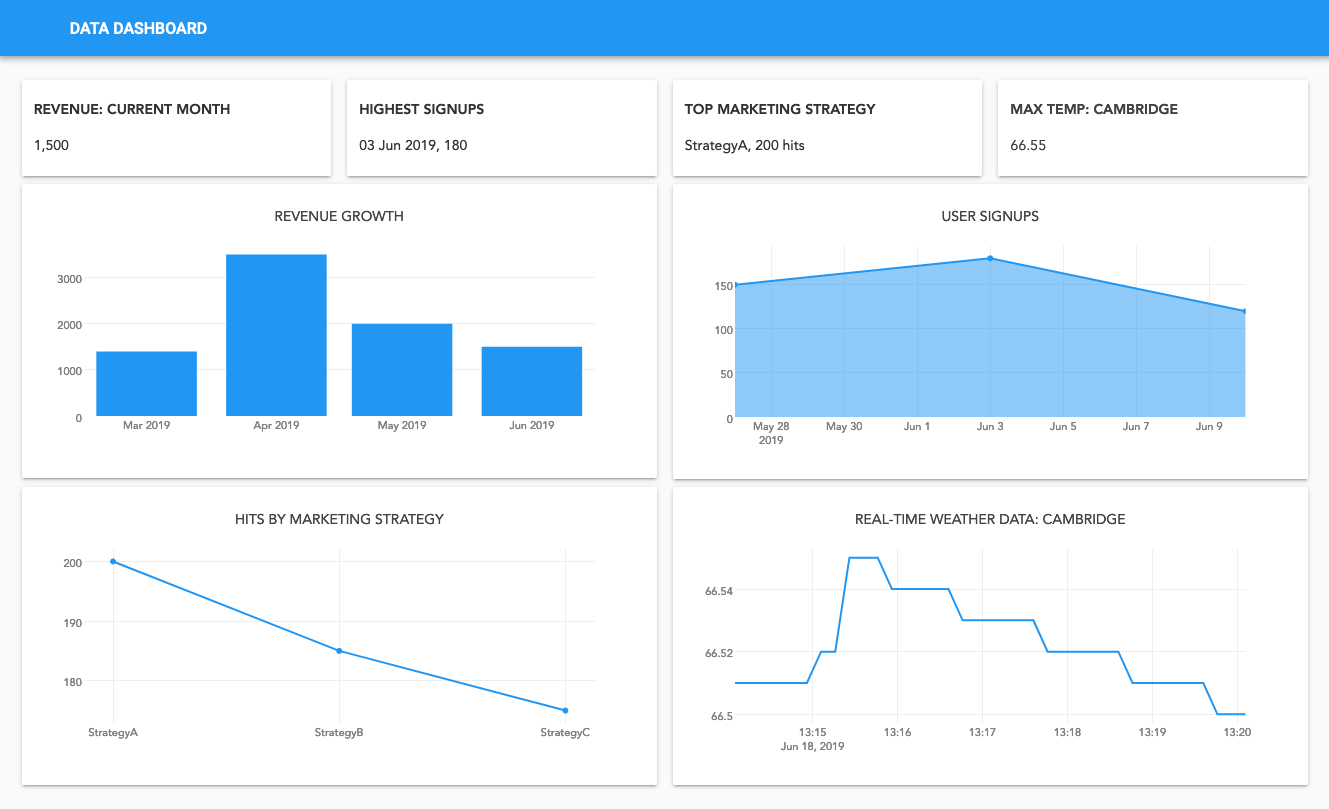
Anvil is a solution that enables developers, analysts and data scientists to deploy their Python code as a Python-only Web Application. Unlike other methods of developing web applications, no JavaScript or HTML programming is required. With Anvil you can focus on the functionality of your application without letting the complexities of building the web app from scratch bog you down.
From a Web App to Excel
With PyXLL you can write fully featured Excel add-ins using nothing but Python. The most commonly used feature of PyXLL is its ability to expose Python functions as “worksheet functions”, so that Python functions can be called from formulas in Excel workbooks.
Typically, you install the Python code for PyXLL to run on the same local PC that is running Excel. Anvil allows Python code to run on remote servers in the same way that it does when web apps run in a web browser. By combining the two we can have an Excel add-in that exposes Python functions deployed in the cloud, run from worksheet functions right in Excel!
The open-source project Anvil-PyXLL bridges Anvil and PyXLL. Exposing a Python function to Excel is as simple as adding the @xl_func decorator to the function definition. We’ll look at how in the next sections.
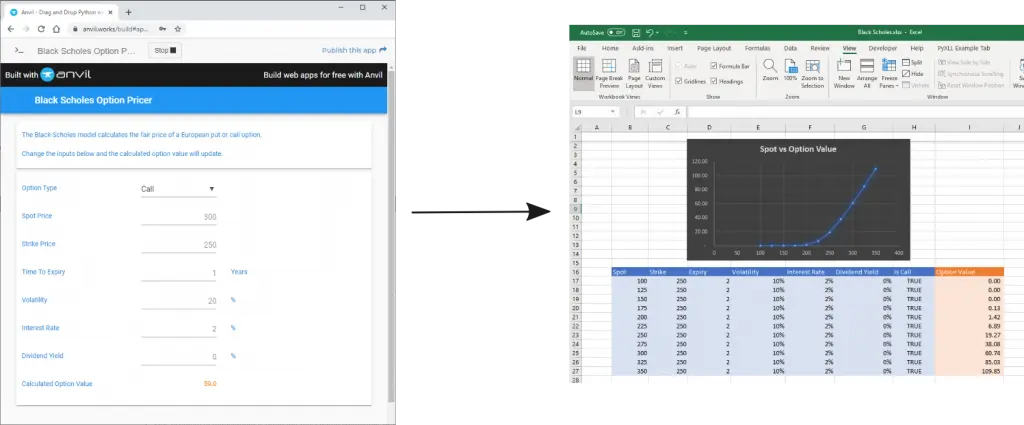
Example: A Black Scholes Option Pricer
The Black Scholes pricing model is a well understood model for pricing European Options. We won’t go into details about it in this post, we will just use it as an example. If you don’t know anything about option pricing don’t be put off, just think of it as a black box function with some inputs that produces an output that we can code in Python.
To follow along in Anvil you can clone the Black Scholes Option Pricer app.
An Option Pricer as a Web App
We will start by creating an Anvil app. To design our web app we drag and drop components onto the form as needed. If you’re new to Anvil take a look at some of the tutorials or clone our Black Scholes Option Pricer app. Here’s what our form looks like after creating all the inputs needed for pricing an option:
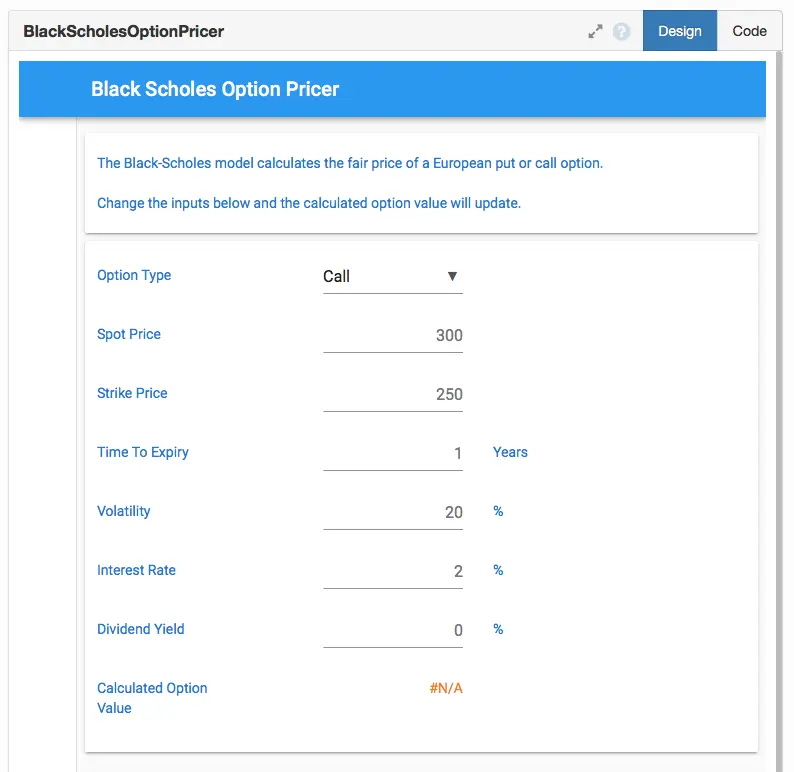
Now we can flip to the Code tab and write the code that will power our web app. The code we write here is Python code but it will actually run in the web browser (or client). This code handles how the user interface should respond to events. The actual option pricing will be performed as a server function.
from anvil import *
import anvil.server


class BlackScholesOptionPricer(BlackScholesOptionPricerTemplate):
  def __init__(self, **properties):
    # Set Form properties and Data Bindings.
    self.init_components(**properties)

    # Any code you write here will run when the form opens.
    self.calculate()

  def calculate(self, **event_args):
    """Calculate the fair price of the option"""
    try:
        self.result.text = "Calculating..."

        spot = float(self.spot.text or self.spot.placeholder)
        strike = float(self.strike.text or self.strike.placeholder)
        expiry = float(self.expiry.text or self.expiry.placeholder)
        volatility = float(self.volatility.text or self.volatility.placeholder) / 100.0
        interest_rate = float(self.interest_rate.text or self.interest_rate.placeholder) / 100.0
        div_yield = float(self.div_yield.text or self.div_yield.placeholder) / 100.0
        is_call = self.option_type.selected_value == 'Call'

        result = anvil.server.call('black_scholes',
                                    spot,
                                    strike,
                                    expiry,
                                    volatility,
                                    interest_rate,
                                    div_yield,
                                    is_call)

        self.result.text = "{result:.2}".format(result=result)
    except Exception as e:
        self.result.text = "Error: {e}".format(e=e)
In code above you will see that we are extracting the values from the form using the names of the controls that we configured when creating the form in the Design view. We then call anvil.server.call(‘black_scholes‘, …) with those inputs and set the result back on the form.
The call to anvil.server.call(‘black_scholes‘, …) is calling our Black Scholes server function which we have yet to write. To add this, on the left hand side in the App Browser click the + icon by SERVER MODULES and add a new module called ‘blackscholes’.
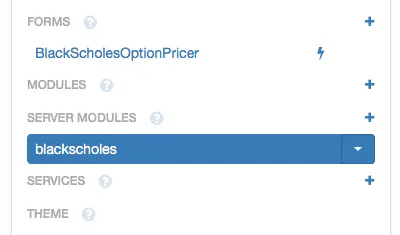
The following code is our ‘backscholes’ module. It is missing a few functions in order to keep the code more readable. For the full module clone the Black Scholes Option Pricer app.
The @anvil.server.callable decorator applied to our ‘black_scholes’ function is what registers this function as a server function. This allows us to call it from the client code using anvil.server.call(‘black_scholes‘, …).
import anvil.server
import math

@anvil.server.callable
def black_scholes(spot,
                  strike,
                  expiry,
                  volatility,
                  interest_rate,
                  dividend_yield,
                  is_call=True):
    """
    Return the fair market value of a European option using the
    Black-Scholes formula.

    :param spot: Spot price
    :param strike: Strike price
    :param expiry: Time to expiry (year fraction)
    :param volatility: Volatility of underlying asset
    :param interest_rate: Risk free interest rate
    :param dividend_yield: Rate of continuous dividend paying asset
    :param is_call: True if call option, False if put option
    :return: Fair market value of the option
    """
    if expiry <= 0.0:
        raise ValueError("Expiry must be > 0")

    if volatility <= 0.0:
        raise ValueError("Volatility must be > 0")

    d1 = (math.log(spot / strike) + (interest_rate - dividend_yield + 0.5 * volatility ** 2) * expiry) / (volatility * math.sqrt(expiry))
    d2 = (math.log(spot / strike) + (interest_rate - dividend_yield - 0.5 * volatility ** 2) * expiry) / (volatility * math.sqrt(expiry))

    if is_call:
        result = (spot * math.exp(-dividend_yield * expiry) * cdf(d1) - strike * math.exp(-interest_rate * expiry) * cdf(d2))
    else:
        result = (strike * math.exp(-interest_rate * expiry) * cdf(-d2) - spot * math.exp(-dividend_yield * expiry) * cdf(-d1))

    return result
Now we have everything in place we can run the Anvil app and test out our option pricer by clicking the “Run” button.
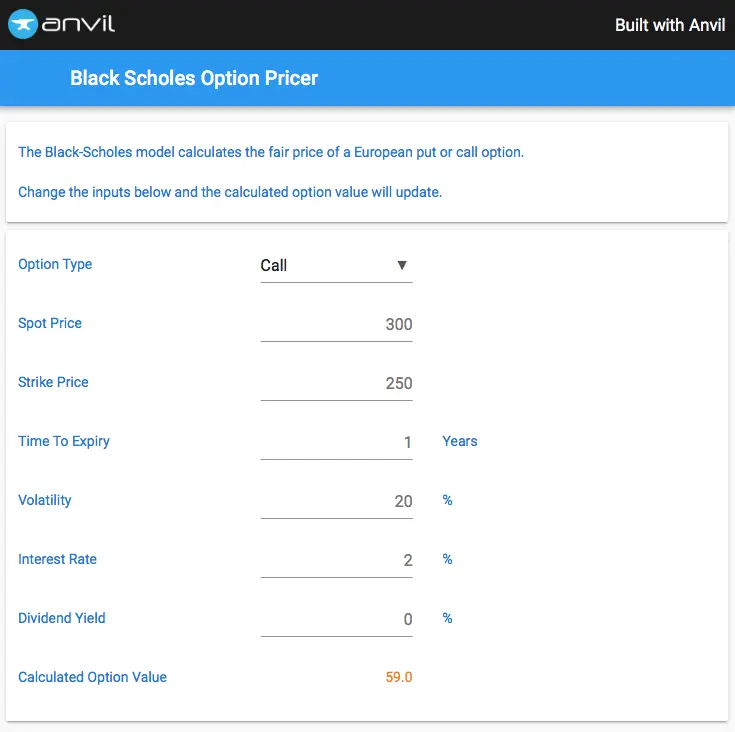
As the values in the form change the server function is called and the calculated option value updates!
Calling the Option Pricer from Excel
Being able to price a single option is one thing but what if we want to price multiple options, or a whole portfolio? Or what if we want to pull in real-time data to use as the inputs to our pricing functions? Excel is a perfect fit for these types of problems. With PyXLL our Python function can be called directly from Excel.
PyXLL is an Excel add-in that you will need to install on your local PC and add to Excel. If you are new to PyXLL you can download a trial version of PyXLL and follow the online documentation to install it.
Python functions are exposed to Excel as Worksheet Functions (also called UDFs – User Defined Functions) via the PyXLL decorator @xl_func. The Python code is written in Python modules, which are listed in the PyXLL config file, pyxll.cfg. PyXLL imports these modules and runs the Python code on the local PC in-process. In order to run the Anvil server functions in the cloud we will use an additional package, anvil-pyxll.
The Anvil-PyXLL package can be downloaded or cloned from GitHub here https://github.com/pyxll/anvil-pyxll. This package contains everything we’ll need to connect Excel and PyXLL to our Anvil web app.
After downloading or cloning the anvil-pyxll project, install the dependencies by running pip install -r requirements.txt in the anvil-pyxll folder.
Setting up the Anvil Uplink
Back in Anvil we need to:
- Enable the Uplink feature so that our black_scholes function can be called from outside of our web app.
- Apply the @xl_func decorator to the black_scholes function so it can be exposed to Excel.
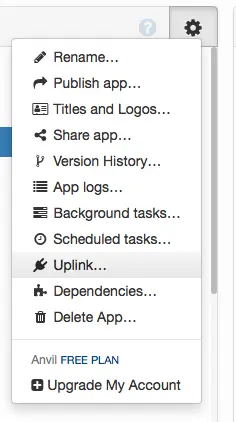
To enable the Uplink feature, in Anvil click on the settings icon in the App Browser and select “Uplink”.
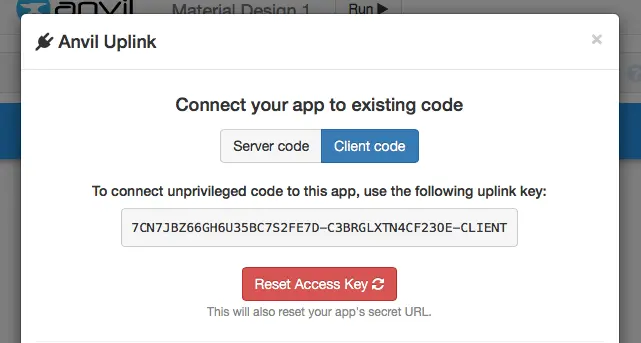
Click on the “Client Code” button and make a note of the uplink key. We will need this shortly to configure the anvil-pyxll package.
Next, clone the PyXLL Anvil App using the link https://pyxll.anvil.app.

Once you have done that go back to your own Anvil app and add this PyXLL app as a dependency. That is done by clicking “Dependencies” in the settings menu in the app browser.
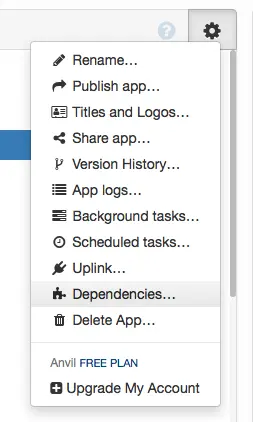
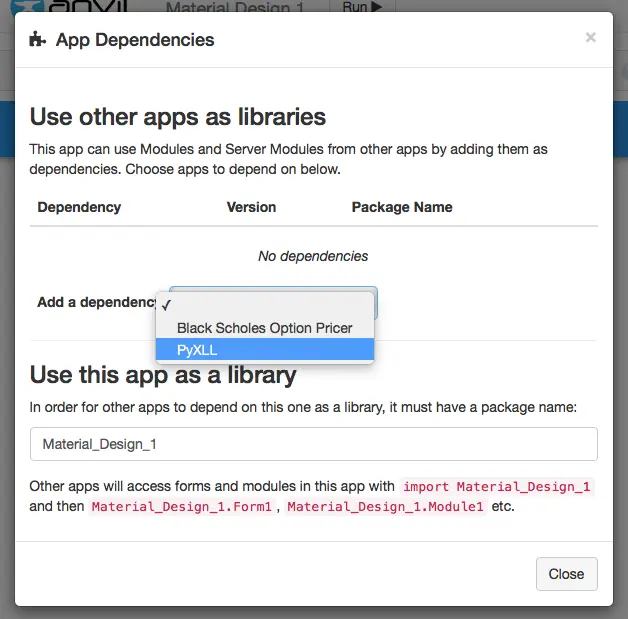
Now that the PyXLL app has been added as a dependency, in the Server Module we can import the @xl_func decorator from the anvil_pyxll.server package. This works in the same way as PyXLL’s normal @xl_func decorator to expose the function as an Excel Worksheet Function, except this works from within an Anvil server module instead of a plain Python module run locally.
from anvil_pyxll.server import xl_func
import anvil.server
import math

@xl_func
@anvil.server.callable
def black_scholes(spot,
                  strike,
                  expiry,
                  volatility,
                  interest_rate,
                  dividend_yield,
                  is_call=True):
    ...
By applying the @xl_func decorator the black_scholes function will be exposed to Excel. The @xl_func decorator has several optional arguments for controlling exactly how the function will behave in Excel which you can read more about in the PyXLL Worksheet Functions section of the documentation.
Calling the Function from Excel
The last thing required is to configure PyXLL to use the anvil-pyxll project downloaded earlier from https://github.com/pyxll/anvil-pyxll.
In the code downloaded find the anvil-pyxll.cfg file and edit it to use the Anvil uplink key that you noted down earlier. If you didn’t make a note of it go back into the Uplink options of the Anvil app and you will be able to copy it from there.
; anvil-pyxll.cfg
[ANVIL]
token = EGNVUIEWSKOLOU77XN2S3QFM-6JJFLNHW5OWUUU5V-CLIENT
In your main pyxll.cfg file, which you will have downloaded as part of PyXLL, include the settings from the anvil-pyxll.cfg file. This can be done by referencing the anvil-pyxll.cfg file as an external config. You will need to change the path below to where you have the anvil-pyxll files.
; pyxll.cfg
[PYXLL]
external_config = C:\Your Files\anvil-pyxll\anvil-pyxll.cfg
If you haven’t already installed and configured PyXLL, you will need to do so now by following the installation instructions in the documentation, as well as making the config change above.
With everything configured correctly, when you start Excel the Anvil-PyXLL package will set up the connection to your Anvil app. Any functions decorated with @xl_func are exposed to Excel as worksheet functions.

You can enter the functions directly in the Excel worksheet. If you use the Excel Function Wizard you’ll see that the docstring from the Python function and the argument names and docstrings have made it across and are visible in Excel.
The code is still running in the cloud as an Anvil server function, so any changes to the Anvil application will be reflected in Excel without needing to change anything on the local PC or deploy any new code to the desktop.
Conclusions
Deploying code to the cloud can have advantages over managing deployment to the local PC.
Anvil enables writing web apps using just Python without the need for specialist web programming abilities.
Excel is an excellent way for users to interact with models and code in a way that cannot easily be replicated in a simple web app. Even the most complex web apps often require Excel import/export features for the times when using Excel is more practical.
PyXLL enables writing Excel add-ins in Python, and in this article we demonstrated how Anvil web apps written in Python can be integrated into Excel using PyXLL and the Anvil-PyXLL pacakge.
If you would like to talk to us about deploying your Python code to the cloud, Excel integration, or anything else, please contact us:
PyXLL: info@pyxll.com
Anvil : contact@anvil.works