The Excel Ribbon interface can be customized using PyXLL. This enables you to add features to Excel in Python that are properly integrated with Excel for an intuitive user experience.
The ribbon customization is defined using an XML file, referenced in the config with the ribbon setting. This can be set to a filename relative to the config file, or as as absolute path. If multiple files are listed they will all be read and merged.
The ribbon XML file uses the standard Microsoft CustomUI schema. This is the same schema you would use if you were customizing the ribbon using COM, VBA or VSTO and there are various online resources from Microsoft that document it [1].
Actions referred to in the ribbon XML file are resolved to Python functions. The full path to the function must be included (e.g. “module.function”) and the module must be on the python path so it can be imported. Often it’s useful to include the modules used by the ribbon in the modules list in the config so that when PyXLL is reloaded those modules are also reloaded, but that is not strictly necessary.
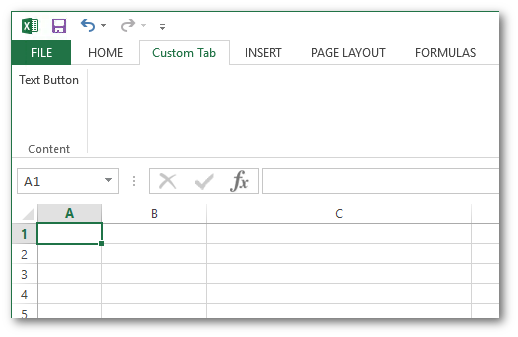
Create a new ribbon xml file. The one below contains a single tab Custom Tab and a single button.
<customUI xmlns="http://schemas.microsoft.com/office/2006/01/customui">
    <ribbon>
        <tabs>
            <tab id="CustomTab" label="Custom Tab">
                <group id="ContentGroup" label="Content">
                    <button id="textButton" label="Text Button"/>
                </group>
            </tab>
        </tabs>
    </ribbon>
</customUI>
Set ribbon in the config file to the filename of the newly created ribbon XML file.
[PYXLL]
ribbon = <full path to xml file>
Start Excel (or reload PyXLL if Excel is already started).

The tab appears in the ribbon with a single text button as specified in the XML file. Clicking on the button doesn’t do anything yet.
Anywhere a callback method is expected in the ribbon XML you can use the name of a Python function.
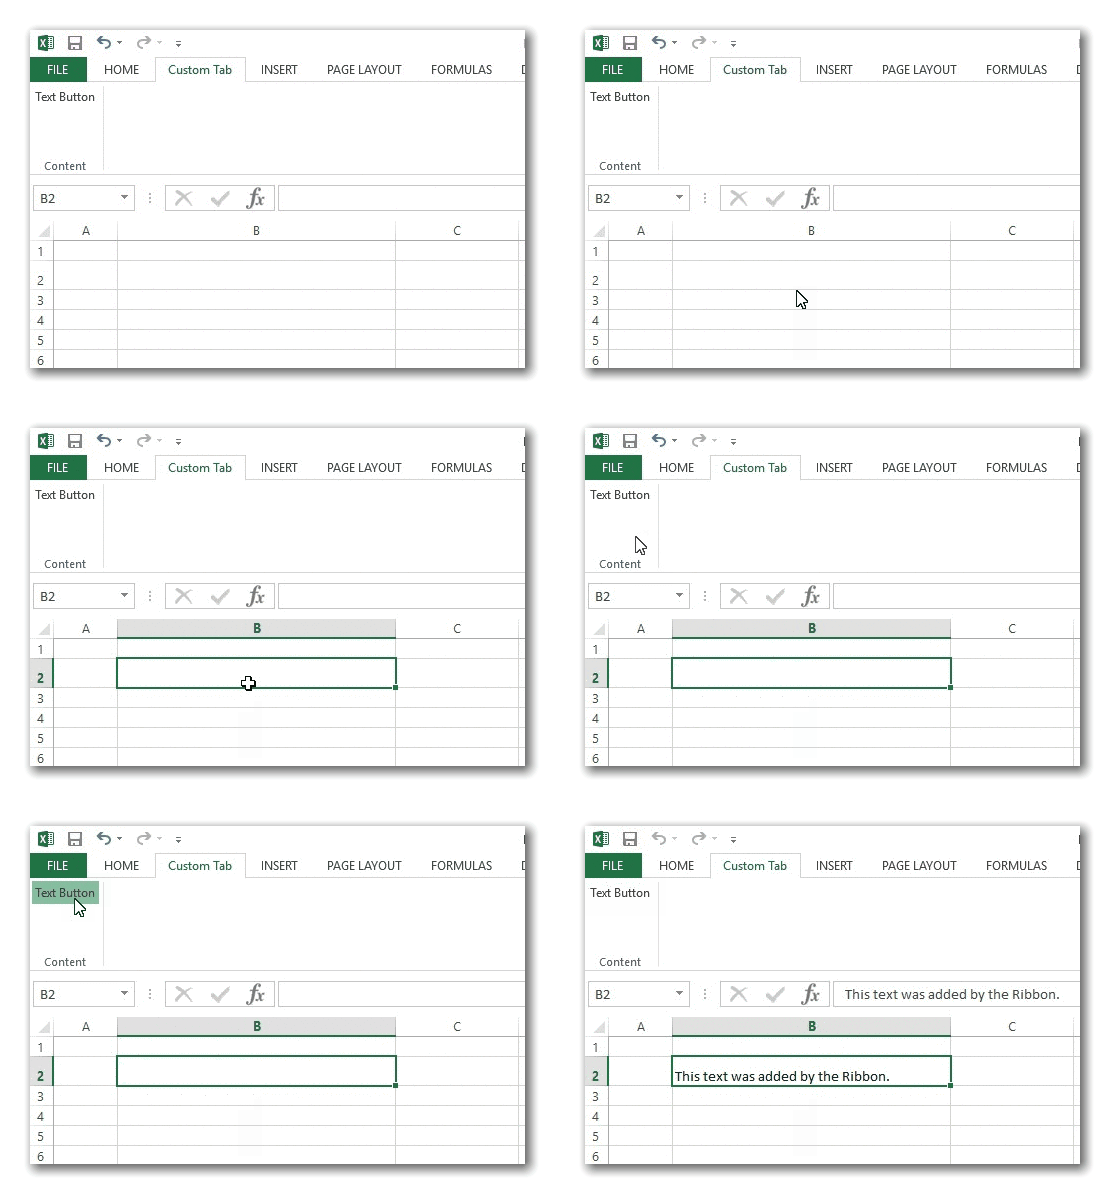
Many of the controls used in the ribbon have an onAction attribute. This should be set to the name of a Python function that will handle the action.
To add an action handler to the example above first modify the XML file to add the onAction attribute to the text button
<customUI xmlns="http://schemas.microsoft.com/office/2006/01/customui">
    <ribbon>
        <tabs>
            <tab id="CustomTab" label="Custom Tab">
                <group id="ContentGroup" label="Content">
                    <button id="textButton" label="Text Button"
                        onAction="ribbon_functions.on_text_button"/>
                </group>
            </tab>
        </tabs>
    </ribbon>
</customUI>
Create the ribbon_functions module with the filename ribbon_functions.py and add the on_text_button function [2]. Note that the module name isn’t important, only that it matches the one used in the xml file.
from pyxll import xl_app

def on_text_button(control):
    xl = xl_app()
    xl.Selection.Value = "This text was added by the Ribbon."
Add the module to the pyxll config [3].
[PYXLL]
modules = ribbon_functions
Reload PyXLL. The custom tab looks the same but now clicking on the text button calls the Python function.

Some controls can use an image to give the ribbon whatever look you like. These controls have an image attribute and a getImage attribute.
The image attribute is set to the filename of an image you want to load. The getImage attribute is a function that will return a COM object that implements the IPicture interface.
PyXLL provides a function, load_image, that loads an image from disk and returns a COM Picture object.
This can be used instead of having to do any COM programming in Python to load images.
When images are referenced by filename using the image attribute Excel will load them using a basic image handler.
This basic image handler is rather limited and doesn’t handle PNG files with transparency, so it’s recommended to
use load_image instead. The image handler can be set as the loadImage attribute on the customUI
element.
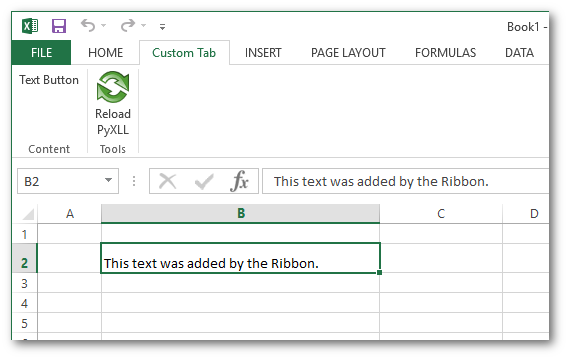
The following shows the example above with a new button added and the loadImage handler set.
<customUI xmlns="http://schemas.microsoft.com/office/2009/07/customui"
            loadImage="pyxll.load_image">
    <ribbon>
        <tabs>
            <tab id="CustomTab" label="Custom Tab">
                <group id="ContentGroup" label="Content">
                    <button id="textButton" label="Text Button"
                        onAction="ribbon_functions.on_text_button"/>
                </group>
                <group id="Tools" label="Tools">
                    <button id="Reload"
                            size="large"
                            label="Reload PyXLL"
                            onAction="pyxll.reload"
                            image="reload.png"/>
                </group>
            </tab>
        </tabs>
    </ribbon>
</customUI>

If using the load_image image loader package resources can also be used as well as filenames. To
specify a package resource use for the format module:resource.
Sometimes its convenient to be able to update the ribbon after Excel has started, without having to change the pyxll.cfg config file.
For example, if your addin is used by multiple users with different roles then one single ribbon may not be applicable for each user. Or, you may want to allow the user to switch between different ribbons depending on what they’re working on.
There are some Python functions you can use from your code to update the ribbon:
These functions can be used to completely replace the current ribbon (set_ribbon_xml) or just to add,
replace or remove tabs (set_ribbon_tab, remove_ribbon_tab).
The ribbon can be updated anywhere from Python code running in PyXLL. Typically this would be when Excel starts
up using the xl_on_open and xl_on_reload event handlers, or from an action function
from the current ribbon.
If multiple ribbon files are found, either because there are multiple listed using the ribbon setting in
the pyxll.cfg file or because additional ones have been found via some entry points they
will be merged automatically.
When merging, any tabs with the same id will be merged into a single tab. Similarly, any groups within those tabs with the same ids will also be merged. You should be careful to use unique ids for all elements so that they do not conflict with any other ribbon elements that might get merged.
The order in which tabs, groups and other elements in groups are merged can be influenced by setting
the attributes insertBefore and insertAfter. These attributes are not part of the ribbon schema
but PyXLL will use them when merging the ribbon files. They can be set on tab and group elements,
or any child element of a group element. One or the other may be set, but not both. Use these to have
elements inserted before or after other elements by their ids.
Footnotes